Skip to content
All Recipes
All Recipes | A Blog With Doctor’s Prescribed Foods
Recipes
Expand
All Recipes
BreakFast Recipes
Privacy Policy
About Us
Contact Us
All Recipes
Toggle Menu
Brunch Recipes
Apple and Cottage Cheese Pancakes Recipe
Nalesniki with Cheese and Pineapple Recipes
Oladi with Apples Recipe
Turkey Crepes (Savory Nalesniki) Recipe
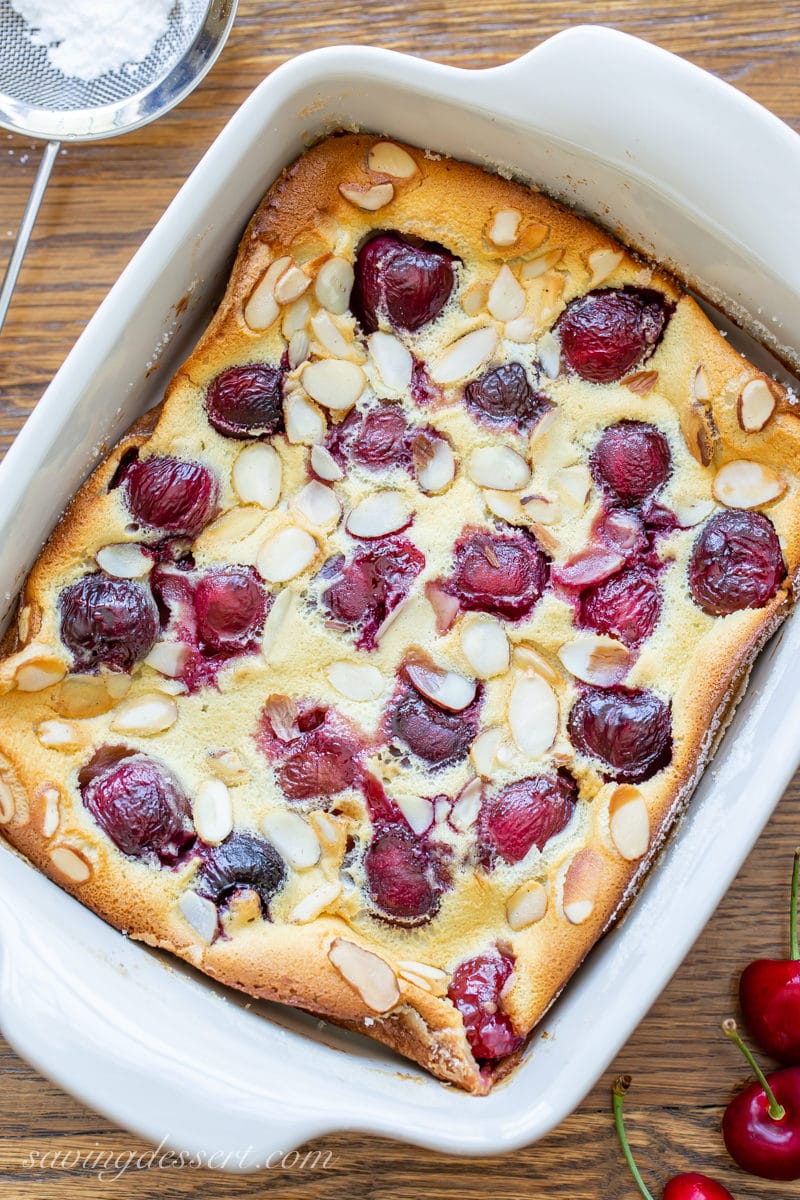
Cherry Clafoutis Recipe
Cheesy Hash Brown and Egg Breakfast Casserole Recipe
Russian Buttermilk Pancakes Recipe
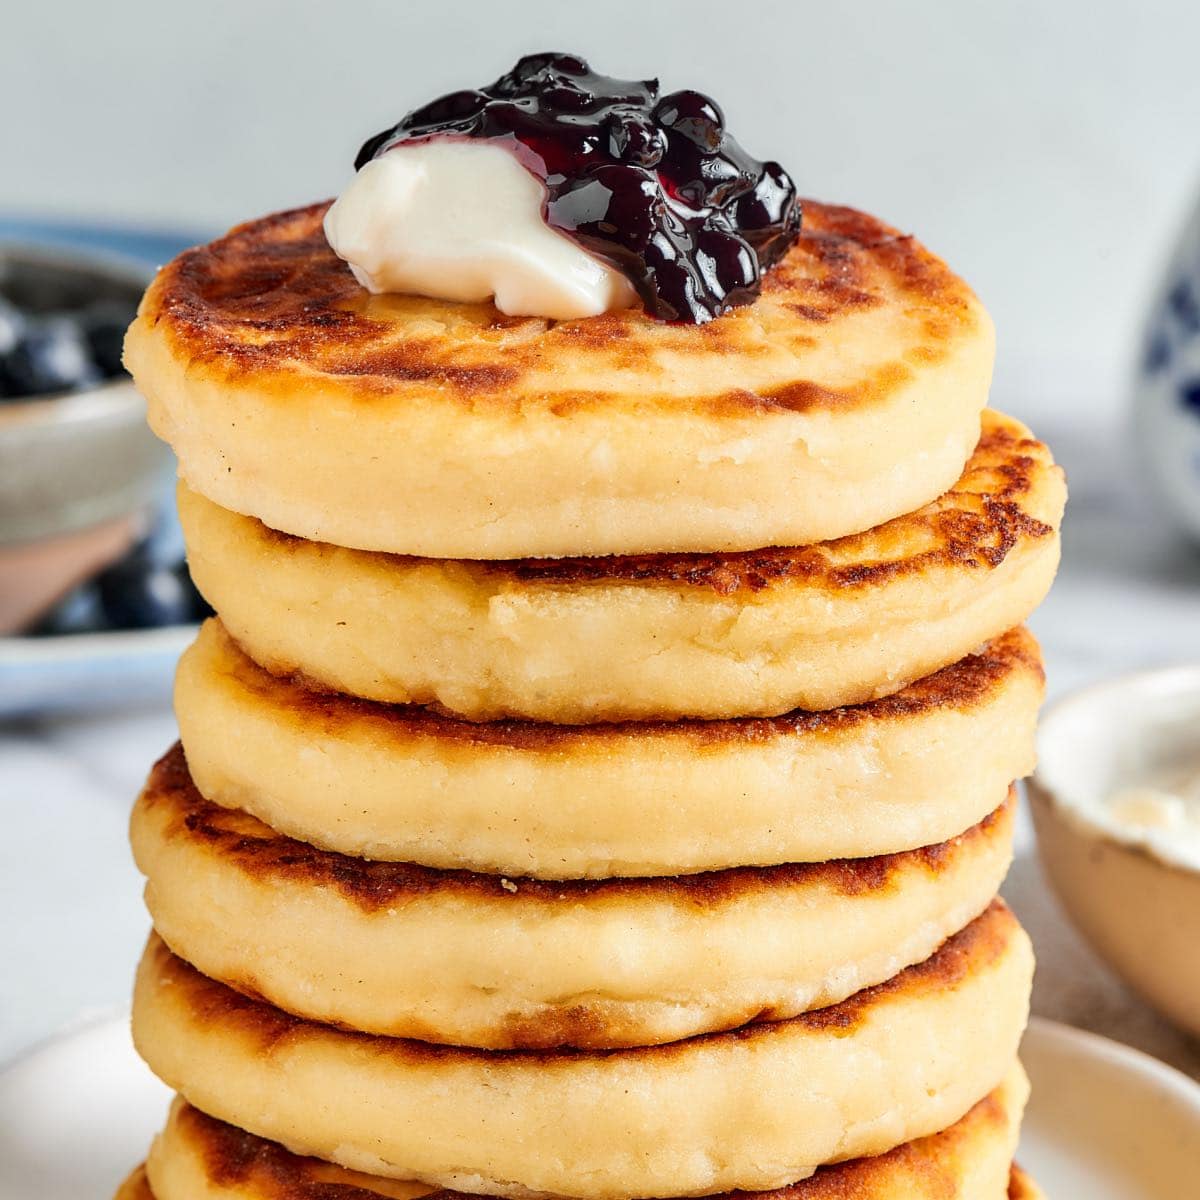
Fluffy Cottage Cheese Pancakes Recipe
Easy Cheese Danish Recipe
Eggs Florentine Recipe
Page navigation
1
2
Next Page
Next
All Recipes | A Blog With Doctor’s Prescribed Foods
Recipes
Toggle child menu
Expand
All Recipes
BreakFast Recipes
Privacy Policy
About Us
Contact Us