Classic Quiche Lorraine Recipe
Classic Quiche Lorraine Recipe: A French Delight at Your Fingertips
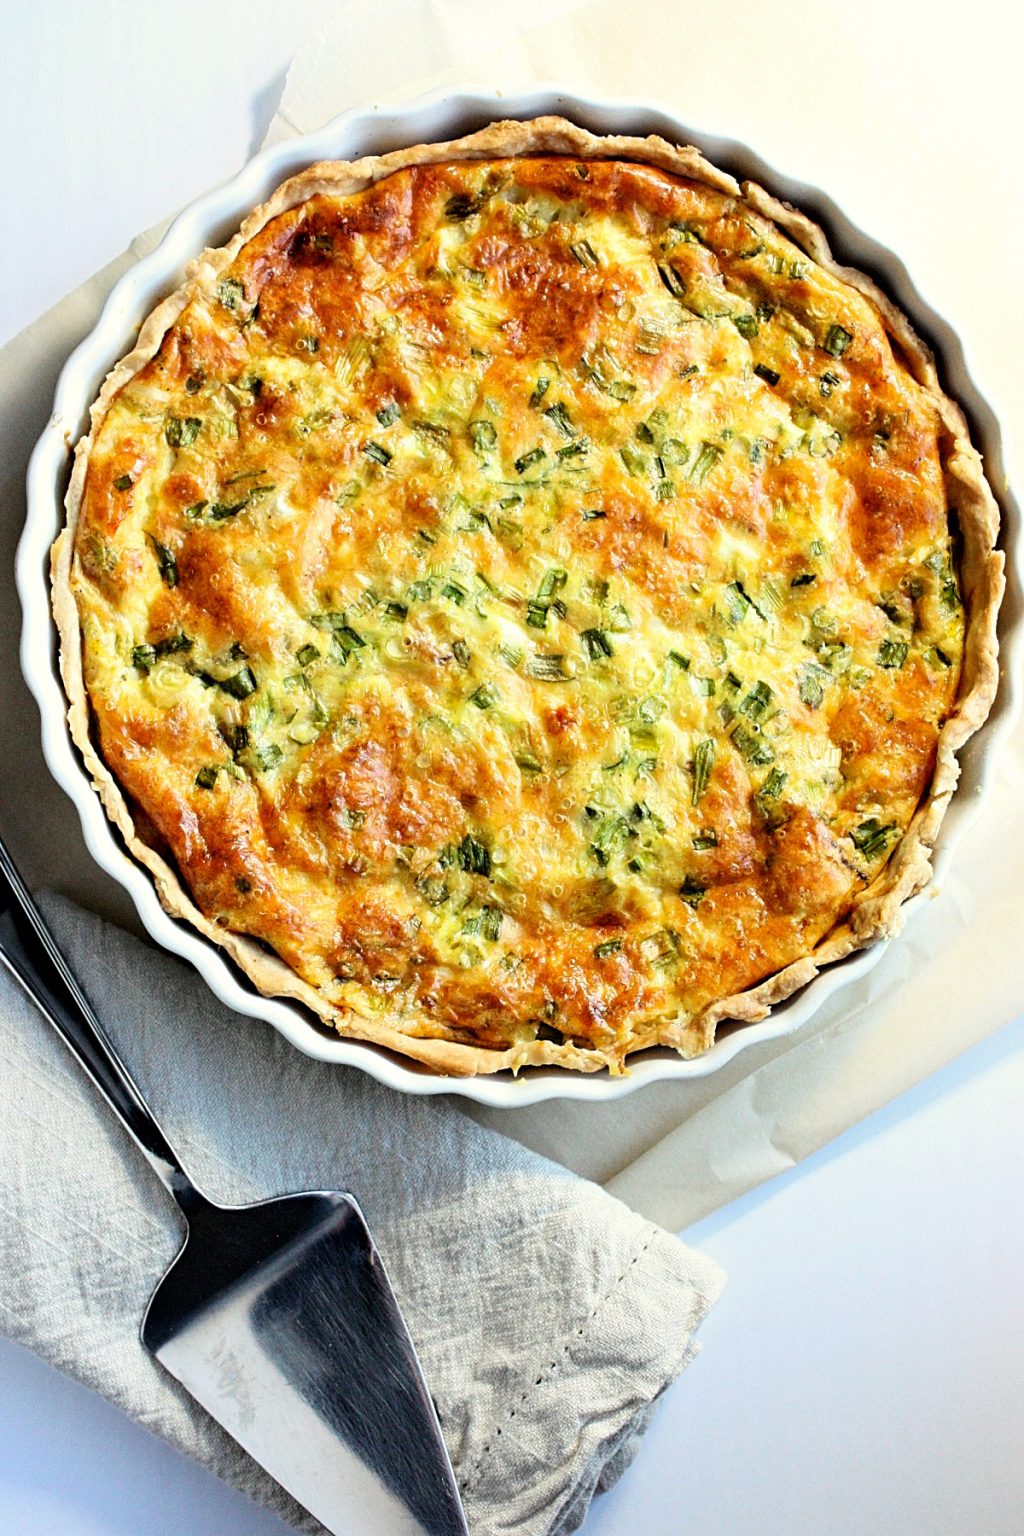
Prepare to embark on a culinary journey with our tantalizing Classic Quiche Lorraine recipe. This delectable French masterpiece captivates with its rich flavors and flaky crust, promising an unforgettable dining experience. Savor the perfect blend of creamy custard, tender fillings, and an irresistibly crispy pastry that will leave you craving for more.
Origin and History of the Quiche Lorraine
The quiche has humble origins in the northeastern region of France, Lorraine. Its roots can be traced back to the Middle Ages, where peasants crafted this hearty dish to nourish themselves during laborious workdays. The name “quiche” is derived from the German word “kuchen,” meaning “cake,” reflecting its origins as a savory pastry.
Personal Touch: A Culinary Adventure
I vividly recall my first encounter with a quiche Lorraine at a charming Parisian bistro. The aroma of rich Gruyère cheese, earthy mushrooms, and fluffy eggs filled the air, tantalizing my taste buds. With each bite, I was transported to a realm of culinary bliss. I have since adopted the recipe, making it a staple in my home, where it has become a crowd-pleaser for family and guests alike.
What to Expect in This Post
In this comprehensive post, we’ll delve into every aspect of the Classic Quiche Lorraine:
- Ingredients and measurement conversions
- Step-by-step cooking instructions
- Estimated cooking time and servings
- Nutritional information, including calories, macronutrients, and vitamins
- Health benefits and potential risks
- Tips and tricks for perfect results
- Equipment needed and their uses
- Serving suggestions
- Storage and reheating guidelines
- Frequently asked questions
Ingredients List
- 1 (9-inch) unbaked pie crust
- 8 large eggs
- 1 cup heavy cream
- 1/2 cup whole milk
- 1/2 teaspoon salt
- 1/4 teaspoon freshly ground black pepper
- 1/2 cup crumbled bacon
- 1 cup shredded Gruyère cheese
- 1/2 cup thinly sliced green onions
- 1/4 cup chopped fresh parsley
Preparation Steps:
- Preheat oven to 350°F (175°C).
- Place the pie crust on a baking sheet.
- In a large bowl, whisk together the eggs, cream, milk, salt, and pepper until well combined.
- Spread the crumbled bacon, Gruyère cheese, green onions, and parsley in the pie crust.
- Pour the egg mixture over the fillings.
- Bake for 35-40 minutes, or until the top is golden brown and the eggs are set.
- Let stand for 10 minutes before slicing and serving.
Cooking Time & Servings
Total cooking time: 45-50 minutes
Serves: 6-8
Nutritional Information
Per serving (1/8 quiche):
- Calories: 350
- Fat: 25g
- Saturated fat: 15g
- Carbohydrates: 15g
- Protein: 20g
- Vitamins and minerals: calcium, iron, vitamin D
Health Benefits and Potential Risks
Benefits:
- Eggs: Rich in protein, healthy fats, and essential vitamins and minerals.
- Dairy: Provides calcium, phosphorus, and vitamin D, important for bone health.
- Gruyère cheese: Contains conjugated linoleic acid (CLA), which has anti-inflammatory properties.
- Bacon: High in protein and omega-3 fatty acids, which may benefit heart health.
- Greens: Provide fiber, vitamins, and antioxidants, which protect against chronic diseases.
Potential Risks:
- Egg yolks: High in cholesterol, so consume in moderation if you have heart health concerns.
- Salt: Can contribute to high blood pressure, so use sparingly.
- Cheese: Can be high in saturated fat, which may increase cholesterol levels.
Tips and Tricks:
- For a richer flavor, use aged Gruyère cheese.
- To lighten the dish, use skim milk or half-and-half instead of heavy cream.
- Add your favorite vegetables, such as spinach, peppers, or zucchini.
- A nonstick pie plate makes it easier to release the quiche.
- Let the quiche cool completely before refrigerating, as this will help prevent a runny filling.
Equipment Needed:
- Pie plate (9-inch)
- Mixing bowls
- Whisk
- Measuring cups and spoons
- Cutting board
- Knife
Variations or Substitutions:
- Crust: Use a homemade crust or frozen pie crust for convenience.
- Fillings: Substitute smoked salmon for bacon, or add sautéed mushrooms or onions.
- Dairy: Replace heavy cream with evaporated milk or coconut milk.
- Gluten-free: Use a gluten-free flour mix for the pie crust.
Serving Suggestions
- Accompany with a leafy green salad and crusty bread.
- Serve with a side of fresh fruit or a dollop of sour cream.
- Top with chives or fresh herbs for garnish.
Storage and Reheating Instructions:
- Storage: Refrigerate for up to 3 days.
- Reheating: Preheat oven to 350°F (175°C) and heat the quiche for 15-20 minutes, or until warmed through.
Conclusion:
Embark on a culinary expedition with our Classic Quiche Lorraine recipe, a testament to French culinary artistry. Its exquisite flavors, versatility, and ease of preparation make it a perfect choice for any occasion. Experiment with our tips and substitutions to create a quiche that reflects your unique taste. We encourage you to share your own variations and experiences in the comments section below. Your feedback is invaluable in our quest to empower culinary enthusiasts like yourself. Savor the joy of home cooking with this timeless recipe that will tantalize your taste buds and warm your heart.
Frequently Asked Questions:
1. Can I use a different type of cheese?
Yes, you can substitute Gruyère cheese with Swiss, cheddar, or Parmesan.
2. Can I make the quiche ahead of time?
Yes, you can make the quiche up to 2 days ahead of time and refrigerate it. Reheat it in the oven before serving.
3. How do I know when the quiche is done?
The quiche is done when the center is set and no longer jiggles. You can also insert a toothpick or knife into the center – if it comes out clean, the quiche is ready.
4. Can I freeze the quiche?
Yes, it is possible to freeze an unbaked quiche for up to 3 months. When ready to eat, thaw and bake as directed.

