Japanese Okonomiyaki Recipe
Introduction:
Are you ready to embark on a culinary journey to Japan with a delicious dish called Okonomiyaki? This savory pancake has a unique blend of flavors that will transport you to the bustling streets of Osaka. Join me as we explore the ins and outs of this Japanese Okonomiyaki Recipe and learn how to recreate this mouthwatering dish in your own kitchen.
Origin and History Of This Recipe:
Okonomiyaki, which translates to “grilled as you like it,” originated in the Kansai region of Japan. Historically, it was a simple dish made with flour, water, and cabbage. Over time, it evolved into a versatile pancake with various toppings and fillings, making it a popular street food in Japan.
Things To Expect In This Article:
In this article, we will delve into the ingredients needed to make Okonomiyaki, the step-by-step preparation process, cooking time and servings, personal anecdotes, nutritional information, health conditions to be aware of, and tips for making the perfect Okonomiyaki.
Ingredients List:
- 2 cups all-purpose flour
- 1 ½ cups dashi stock
- 2 eggs
- 2 cups shredded cabbage
- 1 cup chopped scallions
- 1 cup cooked protein (such as shrimp, pork, or chicken)
- 1 tbsp soy sauce
- 1 tbsp mirin
- 1 tsp salt
- 1 tsp baking powder
- Vegetable oil for frying
Preparation Steps:
- In a large mixing bowl, combine the flour, dashi stock, eggs, soy sauce, mirin, salt, and baking powder. Mix until smooth.
- Add the cabbage, scallions, and protein of your choice to the batter and mix well.
- Heat a non-stick skillet over medium heat and add a tablespoon of vegetable oil.
- Pour a ladleful of the batter onto the skillet and spread it into a round shape. Cook for 3-4 minutes on each side until golden brown.
- Repeat with the remaining batter.
- Serve hot with Okonomiyaki sauce, mayo, and bonito flakes.
Cooking Time & Servings:
This Okonomiyaki recipe serves 4 and takes approximately 30 minutes to prepare and cook.
Personal Touch:
Growing up in Japan, Okonomiyaki was a staple in my household. I have fond memories of making it with my family on special occasions. The versatility of this dish allows you to get creative with toppings and fillings, making it a fun and delicious meal for everyone to enjoy.
Nutritional Information:
Each serving of Okonomiyaki provides a good source of protein, fiber, and essential nutrients. It is a balanced meal that can be customized to fit different dietary preferences.
Health Conditions And People To Avoid This:
While Okonomiyaki is a nutritious dish, individuals with gluten sensitivity or allergies should avoid it due to the wheat flour used in the recipe. Additionally, those with seafood allergies should steer clear of bonito flakes as a topping.
Nutrition and Benefits To The Body:
The combination of protein, vegetables, and carbohydrates in Okonomiyaki provides sustained energy and nourishment for the body. It is a filling and satisfying meal that can be enjoyed as a complete dish.
Disadvantages:
Excess consumption of Okonomiyaki may lead to high sodium intake due to the soy sauce and salt content. Eating moderately is perfectly fine, but acquiring excess of these nutrients is harmful.
Tips and Tricks:
For a vegan version of Okonomiyaki, substitute the protein with tofu or tempeh. You can also add additional vegetables like mushrooms or bell peppers for extra flavor and nutrients.
Equipment Needed:
To make Okonomiyaki, you will need a large mixing bowl, a non-stick skillet, a spatula, and a ladle for pouring the batter onto the skillet.
Variations or Substitutions:
Feel free to customize your Okonomiyaki with your favorite toppings such as bacon, cheese, or kimchi. You can also experiment with different sauces like teriyaki or sriracha for a unique twist.
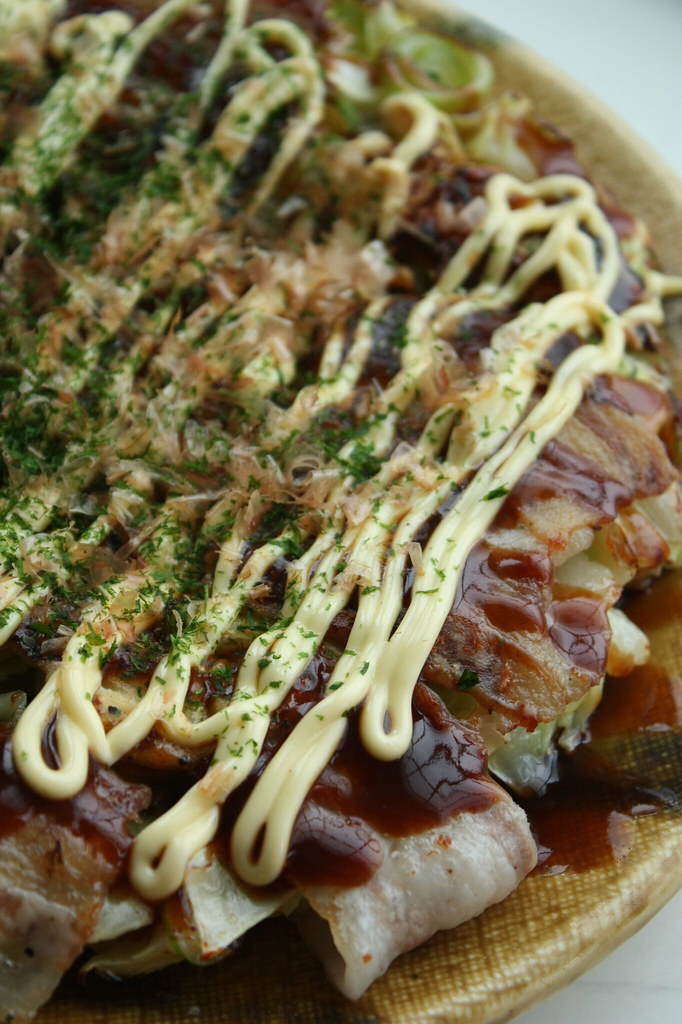
Serving Suggestions:
Serve Okonomiyaki hot off the skillet with a drizzle of Okonomiyaki sauce, a dollop of mayo, and a sprinkle of bonito flakes for an authentic Japanese experience. Pair it with a side of pickled ginger or a light salad for a balanced meal.
Storage and Reheating Instructions:
Leftover Okonomiyaki can be stored in an airtight container in the refrigerator for up to 2 days. To reheat, simply pan-fry the pancakes until heated through or microwave for a quick meal.
Conclusion:
I hope this Japanese Okonomiyaki Recipe inspires you to bring a taste of Japan into your home kitchen. Get creative with your toppings, enjoy the process of making this flavorful dish, and savor every bite. Don’t forget to share your Okonomiyaki creations with us on social media and let us know how it turned out. Happy cooking!
Frequently Asked Questions (FAQs):
- Can I make Okonomiyaki without eggs for a vegan version?
- Yes, you can substitute the eggs with a flaxseed egg or a commercial egg replacer for a vegan-friendly Okonomiyaki.
- What is the difference between Hiroshima-style and Kansai-style Okonomiyaki?
- Hiroshima-style Okonomiyaki has layers of ingredients including noodles, while Kansai-style is mixed together like a pancake.
- Is Okonomiyaki sauce the same as Worcestershire sauce?
- No, Okonomiyaki sauce is a sweet and savory sauce specifically used for Okonomiyaki, while Worcestershire sauce has a different flavor profile.
- Can I freeze Okonomiyaki for later?
- While Okonomiyaki is best enjoyed fresh, you can freeze leftover pancakes in an airtight container for up to 1 month. Reheat in a skillet or microwave before serving.


")


